The Recycle Bin on Windows is just like the Trash on Mac, When you have deleted a file it will be stored in Recycle Bin. We are able to recover deleted files from the Recycle bin by right clicking on the file and confirming “Restore”. By clicking restore, we can able to to do recycle bin recovery and the deleted files and folder will reappear in its original place with the contents, data and time, etc.
But what if the Recycle Bin was emptied after the deletion? Does it mean the files, folders and data are permanently gone? The answer is NO – with the right method and the best data recovery software we could always get back what we lost.

When we emptied the Recycle Bin, the deleted files and folders in it disappeared, but actually they were not removed, not permanently gone from the computer yet. The data still existed on the hard drive in raw formats, but we cannot see it. They would stay there until they were overwritten by some other new data. Before they were overwritten by new data, we have to use the data recovery tool to recover the lost files.
When it comes to free data recovery software, EaseUS don’t need any introduction. It can solve your problems and it will help if you want to recover deleted files from Recycle Bin. EaseUS is the best data recovery wizard to recover deleted, formatted or lost data from your computer, laptop, or any other removable devices easily and quickly.
To recover your deleted files from emptied Recycle Bin, just follow the step-by-step guide and get back your deleted data. It recovers your data in just three simple steps: Launch, Scan and Recover.
Step 1: Launch
Firstly, you have to download the program and install it. After installing it, just find the location where you lost your data and click “Scan” button.

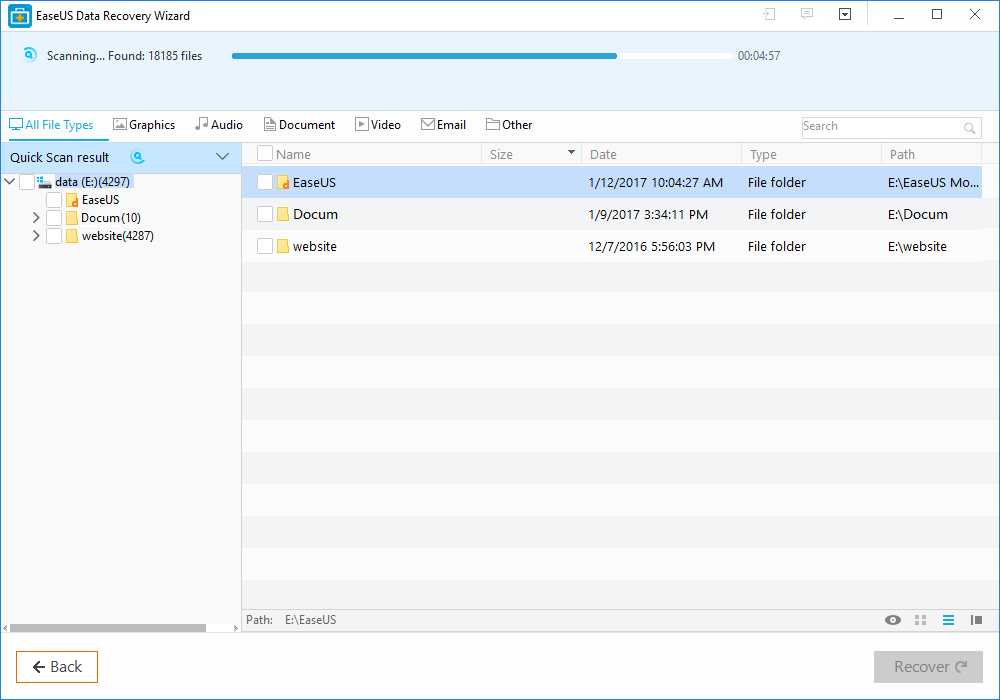
Step 2: Scan
When you click the Scan button, the quick scan will start and in the upper part of the program process bar displaying the status of the recovery. After the process bar is estimated remaining time. When the quick scan has completed, the Deep scan will automatically start to further find the more lost files and data.
Step 3: Recover
When the Deep scan has completed, the EaseUS will show you the preview of recoverable files before recovery. Choose the file, which you want to recover from scanning results and click the “Recover” button and save it.
